A Bead Doll Tutorial

I made this little bead doll in 2008 while I was recuperating from my breast cancer/mastectomy. Don't look too close, I'm still in my Jammies. Of course, this was after I was able to get out of bed and move my arms again.
I remember the cute beaded doll necklaces that were the rage when I was a little girl in elementary school back in the 60's. I wish I still had mine. They sold at M.E.Moses for $1.00 to $2.00. I was going to try to make one like that but I found one similar to this in the gift shop at the hospital and bought it so I could try to make it. Mine isn't as perfect as theirs but it was fun making it and kept me busy since I was stuck in the house and not very mobile.
Tools you will need.
Needle nose pliers,
wire cutters,
flexible but stiff enough to hold it's shape wire,
various size beads,
charm.
Optional: bead stringer spinner.

Cut 3 lengths of wire about 12" each depending on the size of doll
you want to make and depending on the beads.
With the needle nose pliers, wrap about 3 times around the tip
of one end. this will be the feet and hold the beads on the wire.

Choose the beads you want to use for the legs and feet.
A teardrop works well for the feet.
Long beads for the legs. Have fun with it.

Repeat for both legs. When at the right length,
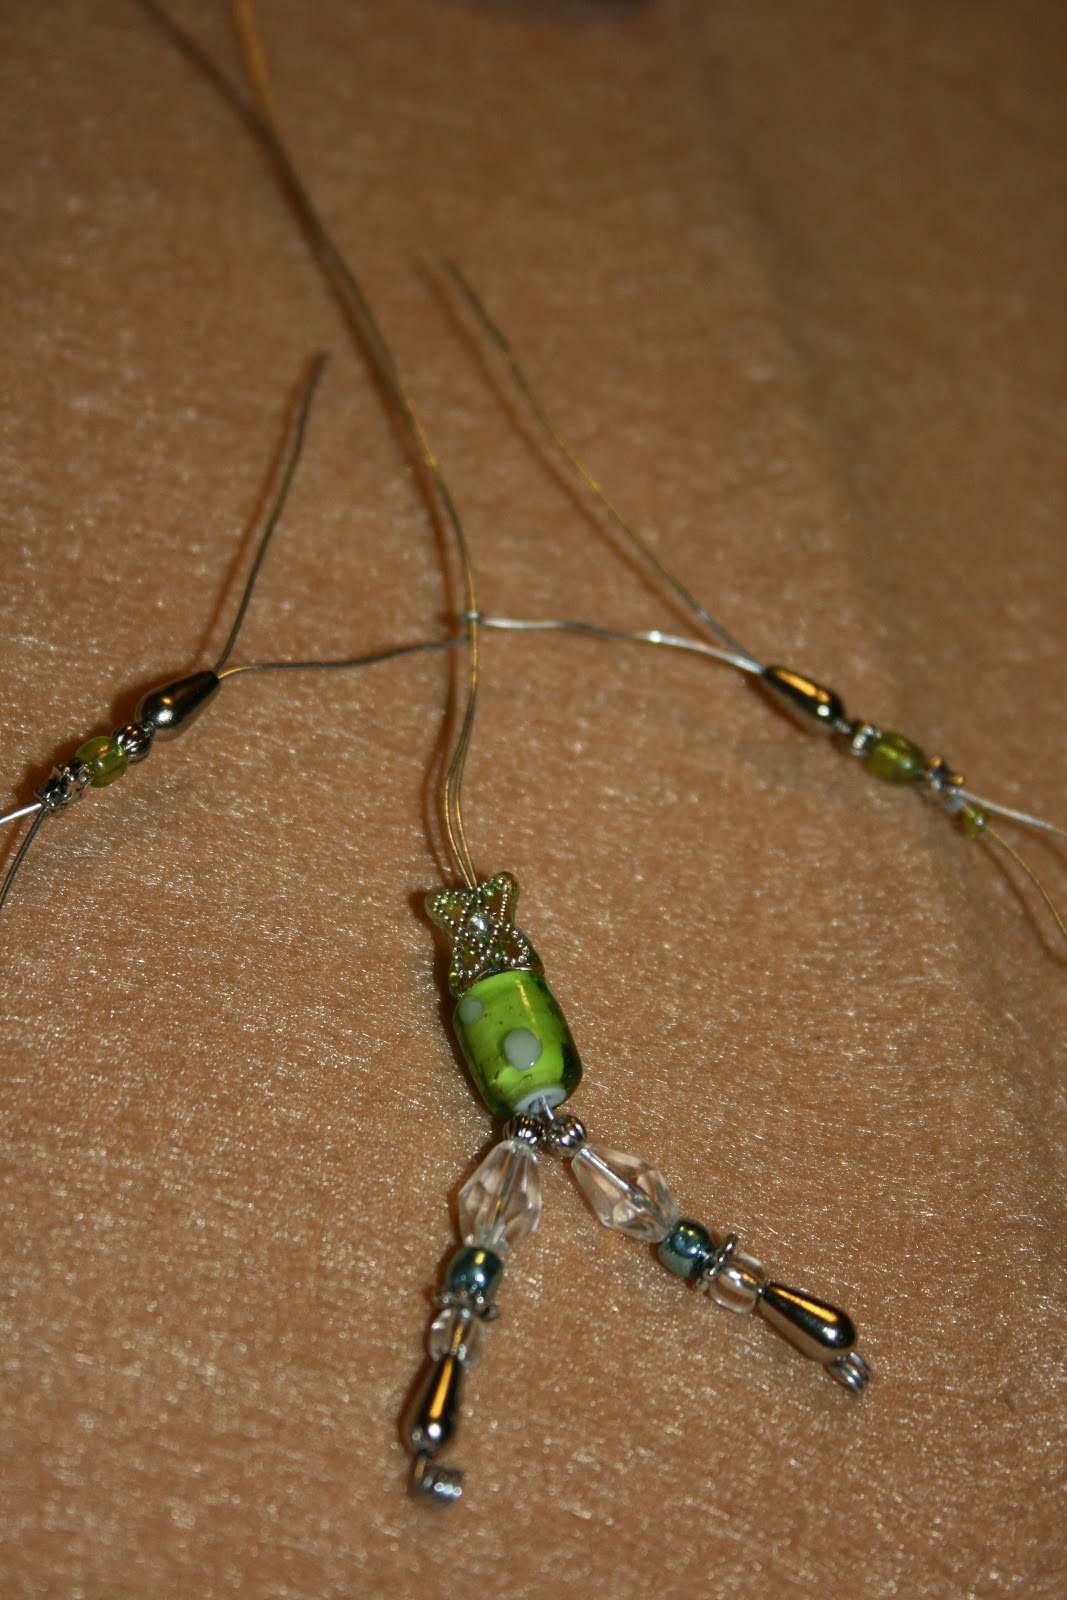
Slide a larger bead onto both wires for the hips.
It will need to have a larger hole to fit both wires through.


Add another bead for the upper body.

Take a second wire, find the center and wrap around the body wire for the arms.

Thread beads on each for the hands and arms.


Another teardrop for the hands then pull back through all the arms beads back to the center.
Add a charm to one of the hands if you like.
Handbag, picture frame, heart, etc.

This is how it looks up to now.
The last bead on the arm only goes through the wire once to create an end.
Use small enough wire that flexible enough to pull back through.

Pull it tight against the body.
You will now have 4 wires at the top.

Choose a larger bead for the head and put all 4 wires through the hole.
On some I added another wire for 6 strands of hair.


String seed beads on each wire.

Clip the ends to desired length.

Wrap the ends around the needle nose pliers about 3 times.

Clip close to spiral.

You can also string the beads with a bead spinner.
Pour some seed beads into the bowl.

Place the end of the wire into the bowl and spin.

The beads will slide up the wire.

Finish off each end.

Squeeze the circles together if needed.

You are now ready to curl the hair.

I used a thin metal rod to wrap the beaded wire around.

Spread out as desired.

Glue a pin back on the doll. You can make a loop for a necklace.

Have fun with it. Be creative.
Lot's of design possibilities.

Some others dolls I made.

Hope you enjoy making the bead dolls and have some fun designing.
I would love to see your creations.
Please leave a comment with a link to share your design.
Morning hair. Really cute. I liked the easy to follow tutorial.
ReplyDelete